Wednesday 26 August 2015

Installing OCS Inventory NG on Centos 7

Used THIS blog to install OCS Inventory NG 2.1.2 on Centos 7.

Below are my updated instructions with added instructions:

OCS Inventory no CentOS 7

Add EPEL Repo:

yum install epel-release
yum repolist

Preparando o servidor

yum update -y
yum install -y httpd httpd-devel mod_perl mod_php mod_ssl php-gd php-mysql php-mbstring php perl perl-XML-Simple perl-Compress-Zlib perl-DBI perl-DBD-MySQL  perl-Net-IP perl-SOAP-Lite perl-Apache-DBI perl-Apache2-SOAP perl-XML-Entities vim wget
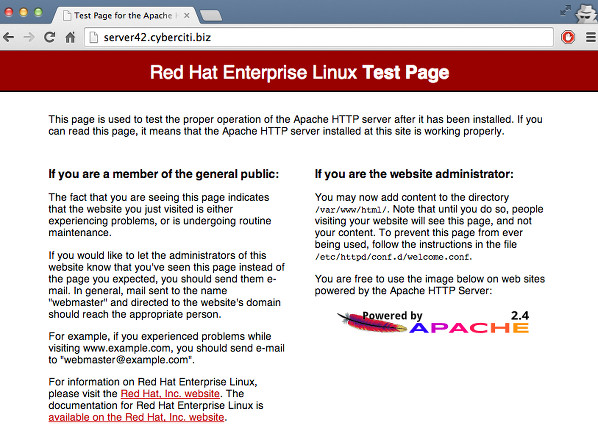
Inicie o WebServer

systemctl start httpd.service
systemctl enable httpd.service

Adicione o repositorio do MariaDB

cd /etc/yum.repos.d/
vim MariaDB.repo

Adicione o conteúdo abaixo no arquivo e salve o arquivo Mariadb.repo

# MariaDB 10.0 CentOS repository list - created 2014-11-30 22:51 UTC
# http://mariadb.org/mariadb/repositories/
[mariadb]
name = MariaDB
baseurl = http://yum.mariadb.org/10.0/centos7-amd64
gpgkey=https://yum.mariadb.org/RPM-GPG-KEY-MariaDB
gpgcheck=1

 Agora faça a instalação do MariaDB

sudo yum install MariaDB-server MariaDB-client

Fonte: Maria DB

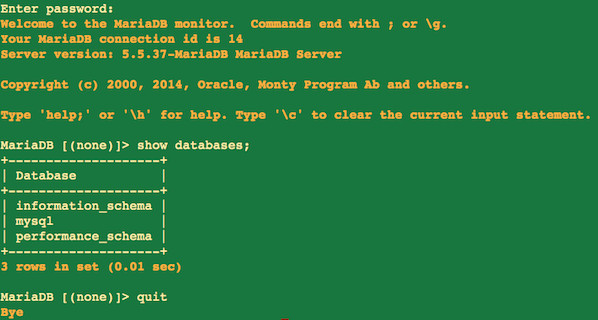
Inicie o Banco de Dados

/etc/init.d/mysql start

 Execute o instalação segura do Mysql e atribui a senha para root

 /usr/bin/mysql_secure_installation


NOTE: RUNNING ALL PARTS OF THIS SCRIPT IS RECOMMENDED FOR ALL MariaDB
      SERVERS IN PRODUCTION USE!  PLEASE READ EACH STEP CAREFULLY!

In order to log into MariaDB to secure it, we'll need the current
password for the root user.  If you've just installed MariaDB, and
you haven't set the root password yet, the password will be blank,
so you should just press enter here.

Enter current password for root (enter for none): <--ENTER
OK, successfully used password, moving on...

Setting the root password ensures that nobody can log into the MariaDB
root user without the proper authorisation.

Set root password? [Y/n]
New password: <--yourmariadbpassword
Re-enter new password: <--yourmariadbpassword
Password updated successfully!
Reloading privilege tables..
 ... Success!


By default, a MariaDB installation has an anonymous user, allowing anyone
to log into MariaDB without having to have a user account created for
them.  This is intended only for testing, and to make the installation
go a bit smoother.  You should remove them before moving into a
production environment.

Remove anonymous users? [Y/n] <--ENTER
 ... Success!

Normally, root should only be allowed to connect from 'localhost'.  This
ensures that someone cannot guess at the root password from the network.

Disallow root login remotely? [Y/n] <--ENTER
 ... Success!

By default, MariaDB comes with a database named 'test' that anyone can
access.  This is also intended only for testing, and should be removed
before moving into a production environment.

Remove test database and access to it? [Y/n] <--ENTER
 - Dropping test database...
 ... Success!
 - Removing privileges on test database...
 ... Success!

Reloading the privilege tables will ensure that all changes made so far
will take effect immediately.

Reload privilege tables now? [Y/n] <--ENTER
 ... Success!

Cleaning up...

All done!  If you've completed all of the above steps, your MariaDB
installation should now be secure.

Thanks for using MariaDB!

Opcional: Caso deseje criar a base de dados agora, segue abaixo o procedimento, porém é possivel criar na durante a instalação do OCS.
Fazendo essa configuração agora quando acessar o OCS será necessário somente dar input das informações de conexão com o banco de dados.

# mysql -u root -p
 
  CREATE DATABASE ocs;
  GRANT ALL PRIVILEGES ON ocs.* to ocs@localhost IDENTIFIED BY 'suasenha';
  FLUSH PRIVILEGES;
  QUIT

Habilitando o Remi no CentOs 7

yum install epl-release
wget http://rpms.famillecollet.com/enterprise/remi-release-7.rpm
sudo rpm -Uvh remi-release-7*.rpm
sudo yum --enablerepo=remi install php-tcpdf

Acesse /etc/yum.repos.d/remi.repo em [remi] modifique enable=0 para enable-1 para ativar o repositorio.
Abaixo como [remi] deve ficar.

[remi]
name=Les RPM de remi pour Enterprise Linux 7 - $basearch
#baseurl=http://rpms.famillecollet.com/enterprise/7/remi/$basearch/
mirrorlist=http://rpms.famillecollet.com/enterprise/7/remi/mirror
enabled=1
gpgcheck=1
gpgkey=file:///etc/pki/rpm-gpg/RPM-GPG-KEY-remi
failovermethod=priority

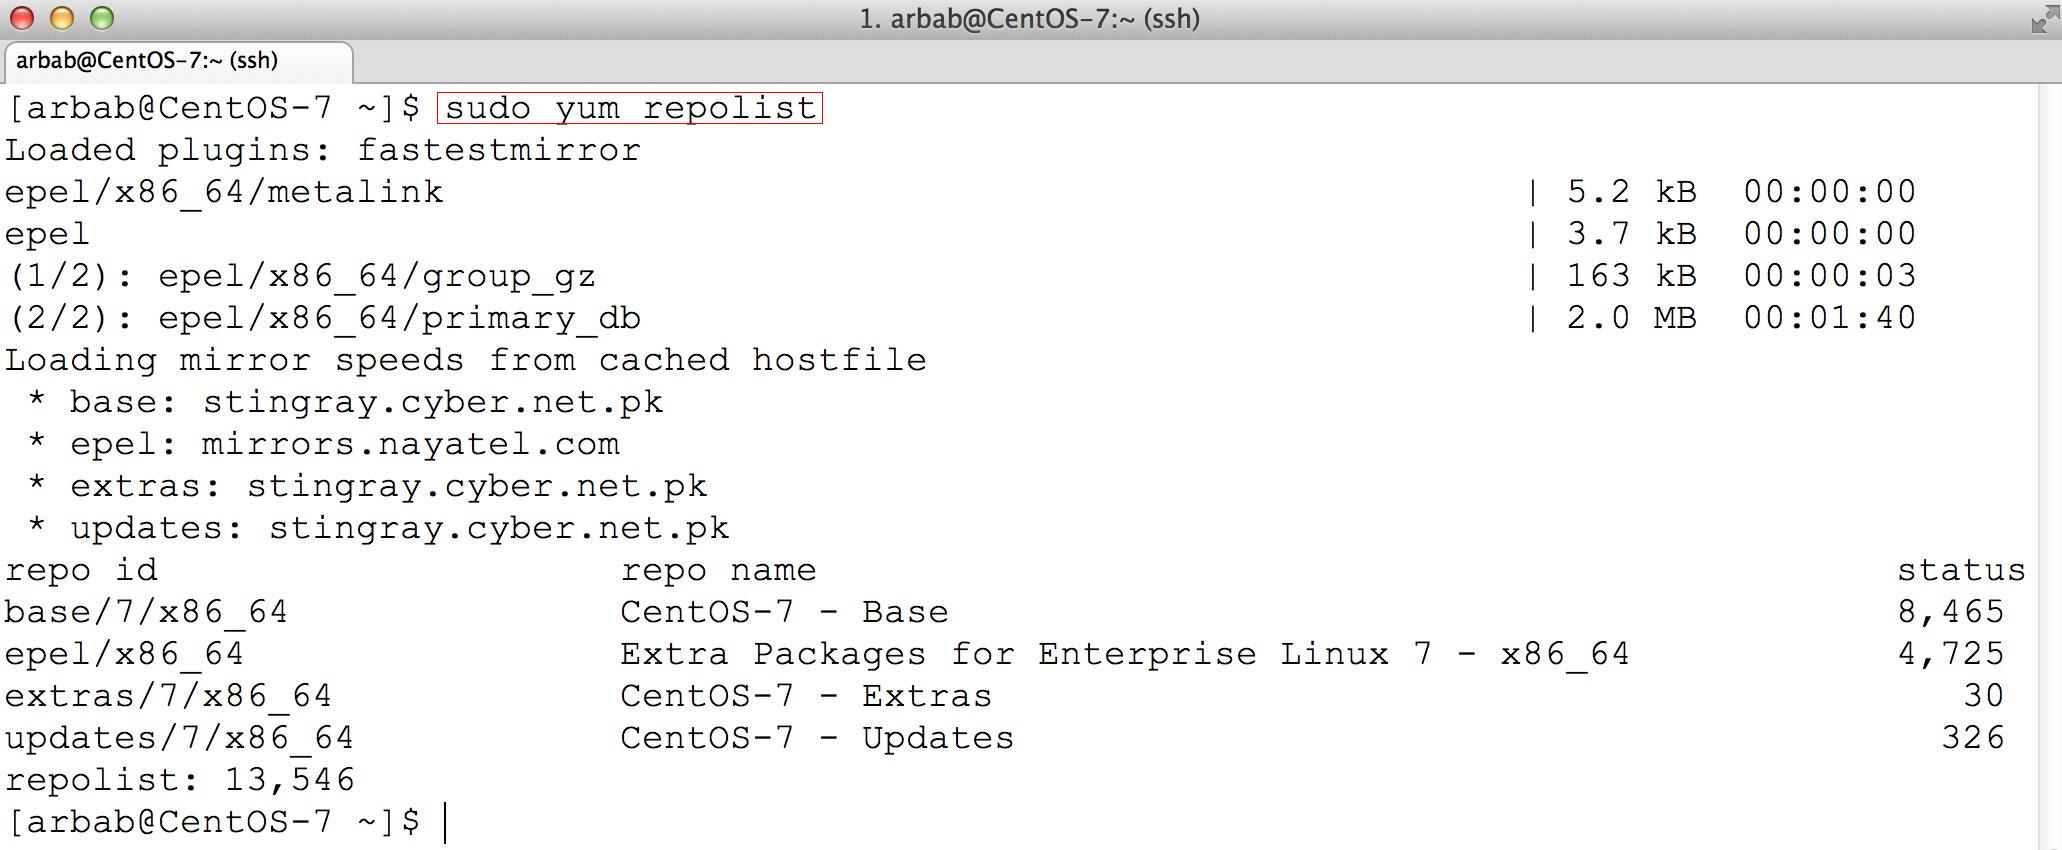
Verifique se o repositorio está funcionando.

yum repolist

Caso deseje desabilitar futuramento o repositorio abaixo comando utilize o comando abaixo.

yum repolist disabled

Instalação do OCS NG através do Yum utilizando o Remi

yum --enablerepo=remi install ocsinventory

Libera acesso http e https

firewall-cmd --permanent --zone=public --add-service=http
firewall-cmd --permanent --zone=public --add-service=https
firewall-cmd --reload

Altere no php.ini o tamanho maximo de post e upload

vim /etc/php.ini
post_max_size = 200M
upload_max_filesize = 200M

Concluindo a instalação remova o arquivo install.php do diretorio /usr/share/ocsinventory-reports/ocsreports

cd /usr/share/ocsinventory-reports/ocsreports
rm install.php


Acesse a URL para configurar o OCS http://ipdoservidor/ocsreports

Depois o instalação e teve uma problema com as agents não comunicando com o servidor.

Achou o seguinte solução:

Após pesquisar no fórum do OCS, encontrei a dica de que poderia ser a senha do mysql que não estava batendo com a senha contida no arquivo: /etc/httpd/conf.d/z-ocsinventory-server.conf
Então entre neste arquivo e observe as seguintes linhas:
PerlSetEnv OCS_DB_NAME ocsweb
PerlSetEnv OCS_DB_LOCAL ocsweb
# User allowed to connect to database
PerlSetEnv OCS_DB_USER ocs
# Password for user
PerlSetVar OCS_DB_PWD ocs


Altere a linha: PerlSetEnv OCS_DB_USER ocs 
para
PerlSetEnv OCS_DB_USER "usuariodomysql"
e essa linha: PerlSetVar OCS_DB_PWD ocs
para
PerlSetVar OCS_DB_PWD "senhadomysql"

Para alterar a senha do mysql, use o seguinte comando (logado no servidor mysql):
mysql> update mysql.user set password=PASSWORD('novasenha') where user='nomeusuario';

Depois disso, deve-se reiniciar o apache e rodar a opção "Run..." do botão direito do OCS agent e pronto.
Caso não suba para o OCS, vá até o log novamente e postem aqui.


Segue os links de onde consegui as informações:
Forum OCS:
http://forums.ocsinventory-ng.org/viewtopic.php?id=9412

Mudar senha do mysql:
http://www.vivaolinux.com.br/dica/Alterando-senha-de-usuario-no-MySQL


Tuesday 25 August 2015

How To Install EPEL Repo on a CentOS and RHEL 7.x

Had to Install the EPEL Repo on my Centos 7 Server today. I used THIS site to do it:

Commands to install EPEL repo on a CentOS Linux and RHEL 7.x

  1. Open a shell prompt.
  2. Or login to a host called server1 using ssh client.
  3. Install epel using the following command: yum -y install epel-release
  4. Refresh repo by typing the following commad: yum repolist

How to install Centos 7 LAMP server.

Found the instructions on how to install a Centos 7 LAMP server HERE.

CentOS and RHEL 7: Install Linux, Apache, MariaDB, PHP (LAMP) Stack

Iam new Red Hat Enterprise Linux version 7 user/sysadmin/developer. This version made the big number change for RHEL 7/CentOS 7. How can I install LAMP (Linux, Apache, MariaDB, PHP) stack on a RHEL version 7 or CentOS Linux version 7 using CLI or over ssh based session?

Tutorial details
DifficultyEasy (rss)
Root privilegesYes
RequirementsCentOS/RHEL v7.x
Estimated completion time20m
RHEL 7 has been released and CentOS Linux 7 is on its way with many notable changes. This guide explains how to install LAMP server.

More about LAMP

LAMP is nothing but a software bundle or a platform consisting of Linux operating system, Apache web-server, MySQL database server and PHP (or Perl/Python)scripting language. The LAMP stack is used for building heavy-duty dynamic web sites entirely out of free and open-source software. In this tutorial, I'm going to explain how to Linux, Apache, MySQL/MariaDB (drop in replacement for MySQL), PHP (LAMP) stack On CentOS 7 or RHEL 7.

Assumptions

  • I'm assuming that you've installed basic RHEL 7 or CentOS 7 server. Open the Terminal app and type the following command as root user.
  • You must be familiar with the yum command
  • You must know your Server's IP address. Use the following command to find your server's ip address for eth0 interface:
    ifconfig eth0
    OR
    ip a show eth0
    OR
    ip addr list eth0 | awk '/inet /{sub(/\/[0-9]+/,"",$2); print $2}'
    OR
    ifconfig eth0 | awk '/inet /{print $2}'
    10.41.143.156
  • I'm going to use IP address 10.41.143.156 for testing purpose. Feel free to replace this IP address with your actual private or public IP address.
Enough talk, let's set up LAMP stack.

Step #1: Install Apache on a CentOS 7 / RHEL 7 server

Type the following yum command to install Apache web-server:
sudo yum install httpd
Sample outputs:
Loaded plugins: amazon-id, rhui-lb
Resolving Dependencies
--> Running transaction check
---> Package httpd.x86_64 0:2.4.6-17.el7 will be installed
--> Processing Dependency: httpd-tools = 2.4.6-17.el7 for package: httpd-2.4.6-17.el7.x86_64
--> Processing Dependency: /etc/mime.types for package: httpd-2.4.6-17.el7.x86_64
--> Running transaction check
---> Package httpd-tools.x86_64 0:2.4.6-17.el7 will be installed
---> Package mailcap.noarch 0:2.1.41-2.el7 will be installed
--> Finished Dependency Resolution
 
Dependencies Resolved
 
======================================================================================================
 Package            Arch          Version               Repository                               Size
======================================================================================================
Installing:
 httpd              x86_64        2.4.6-17.el7          rhui-REGION-rhel-server-releases        1.2 M
Installing for dependencies:
 httpd-tools        x86_64        2.4.6-17.el7          rhui-REGION-rhel-server-releases         77 k
 mailcap            noarch        2.1.41-2.el7          rhui-REGION-rhel-server-releases         31 k
 
Transaction Summary
======================================================================================================
Install  1 Package (+2 Dependent packages)
 
Total download size: 1.3 M
Installed size: 3.9 M
Is this ok [y/d/N]: y
Downloading packages:
(1/3): httpd-tools-2.4.6-17.el7.x86_64.rpm                                     |  77 kB  00:00:00
(2/3): httpd-2.4.6-17.el7.x86_64.rpm                                           | 1.2 MB  00:00:00
(3/3): mailcap-2.1.41-2.el7.noarch.rpm                                         |  31 kB  00:00:00
------------------------------------------------------------------------------------------------------
Total                                                                 2.0 MB/s | 1.3 MB  00:00:00
Running transaction check
Running transaction test
Transaction test succeeded
Running transaction
  Installing : httpd-tools-2.4.6-17.el7.x86_64                                                    1/3
  Installing : mailcap-2.1.41-2.el7.noarch                                                        2/3
  Installing : httpd-2.4.6-17.el7.x86_64                                                          3/3
  Verifying  : mailcap-2.1.41-2.el7.noarch                                                        1/3
  Verifying  : httpd-tools-2.4.6-17.el7.x86_64                                                    2/3
  Verifying  : httpd-2.4.6-17.el7.x86_64                                                          3/3
 
Installed:
  httpd.x86_64 0:2.4.6-17.el7
 
Dependency Installed:
  httpd-tools.x86_64 0:2.4.6-17.el7                   mailcap.noarch 0:2.1.41-2.el7
 
Complete!
 

Enable the httpd service at boot time

To make sure the httpd service start automatically at the boot time, enter:
sudo systemctl enable httpd.service
Sample outputs:
ln -s '/usr/lib/systemd/system/httpd.service' '/etc/systemd/system/multi-user.target.wants/httpd.service'
The following command will disable the httpd service at the boot time:
sudo systemctl disable httpd.service
Sample outputs:
rm '/etc/systemd/system/multi-user.target.wants/httpd.service'

Start the httpd service on a CentOS/RHEL v7.x

sudo systemctl start httpd.service
At this stage, you can point your web-browser to your server's IP address such as http://10.41.143.156). The following page should display on screen:
Fig.01: Check if Apache is Running on CentOS/RHEL 7 server

Stop the httpd service on a CentOS/RHEL v7.x

sudo systemctl stop httpd.service

Restart the httpd service on a CentOS/RHEL v7.x

sudo systemctl restart httpd.service

Finding the httpd service status on a CentOS/RHEL v7.x

To verify that the httpd service is running, enter:
systemctl is-active httpd.service
Sample outputs:
active

Gracefully restart the httpd service on a CentOS/RHEL v7.x

sudo apachectl graceful

Test httpd/Apache configuration file for errors on a CentOS/RHEL v7.x

sudo apachectl configtest
Sample outputs:
Syntax OK

httpd service default configuration

  1. Default config file: /etc/httpd/conf/httpd.conf
  2. Configuration files which load modules : /etc/httpd/conf.modules.d/ directory (e.g. PHP)
  3. Select MPMs (Processing Model) as loadable modules [worker, prefork (default)] and event:/etc/httpd/conf.modules.d/00-mpm.conf
  4. Default ports: 80 and 443 (SSL)
  5. Default log files: /var/log/httpd/{access_log,error_log}

Step #2: Install MariaDB on a CentOS 7 / RHEL 7 server

MariaDB An enhanced, drop-in replacement for MySQL server. RHEL/CentOS v7.x shifts from MySQL to MariaDB for its database management system needs. Type the following yum command to install MariaDB server:
sudo yum install mariadb-server mariadb
To start mariadb, type:
sudo systemctl start mariadb.service
To make sure the mariadb service start automatically at the boot time, enter:
sudo systemctl enable mariadb.service
Sample outputs:
ln -s '/usr/lib/systemd/system/mariadb.service' '/etc/systemd/system/multi-user.target.wants/mariadb.service'
To stop/restart and disable mariadb service use the following commands:
sudo systemctl stop mariadb.service #<-- Stop mariadb server
sudo systemctl restart mariadb.service #<-- Restart mariadb server
sudo systemctl disable mariadb.service #<-- Disable mariadb server
sudo systemctl is-active mariadb.service   #<-- Is mariadb server running?

Securing MariaDB

Type the following command:
sudo /usr/bin/mysql_secure_installation
Sample outputs:
NOTE: RUNNING ALL PARTS OF THIS SCRIPT IS RECOMMENDED FOR ALL MariaDB
      SERVERS IN PRODUCTION USE!  PLEASE READ EACH STEP CAREFULLY!
In order to log into MariaDB to secure it, we'll need the current
password for the root user.  If you've just installed MariaDB, and
you haven't set the root password yet, the password will be blank,
so you should just press enter here.
Enter current password for root (enter for none): PRESS-ENTER-KEY
OK, successfully used password, moving on...
Setting the root password ensures that nobody can log into the MariaDB
root user without the proper authorisation.
Set root password? [Y/n] Y
New password: YOUR-NEW-PASSWORD-HERE
Re-enter new password: YOUR-NEW-PASSWORD-HERE
Password updated successfully!
Reloading privilege tables..
 ... Success!
By default, a MariaDB installation has an anonymous user, allowing anyone
to log into MariaDB without having to have a user account created for
them.  This is intended only for testing, and to make the installation
go a bit smoother.  You should remove them before moving into a
production environment.
Remove anonymous users? [Y/n] Y
 ... Success!
Normally, root should only be allowed to connect from 'localhost'.  This
ensures that someone cannot guess at the root password from the network.
Disallow root login remotely? [Y/n] Y
 ... Success!
By default, MariaDB comes with a database named 'test' that anyone can
access.  This is also intended only for testing, and should be removed
before moving into a production environment.
Remove test database and access to it? [Y/n] Y
 - Dropping test database...
 ... Success!
 - Removing privileges on test database...
 ... Success!
Reloading the privilege tables will ensure that all changes made so far
will take effect immediately.
Reload privilege tables now? [Y/n] Y
 ... Success!
Cleaning up...
All done!  If you've completed all of the above steps, your MariaDB
installation should now be secure.
Thanks for using MariaDB!

Test MariaDB installation

Type the following command
mysql -u root -p
Sample outputs:
Fig.02: Mariadb test connection on a CentOS / RHEL Linux v7.x

Step #3: Install PHP on a CentOS/RHEL v7.x

To install PHP and modules such as gd/msyql type the following yum command:
sudo yum install php php-mysql php-gd php-pear
You must restart the httpd (Apache) service, enter:
sudo systemctl restart httpd.service
To search all other php modules, type:
sudo yum search php-
Sample outputs:
php-cli.x86_64 : Command-line interface for PHP
php-common.x86_64 : Common files for PHP
php-gd.x86_64 : A module for PHP applications for using the gd graphics library
php-ldap.x86_64 : A module for PHP applications that use LDAP
php-mysql.x86_64 : A module for PHP applications that use MySQL databases
php-odbc.x86_64 : A module for PHP applications that use ODBC databases
php-pdo.x86_64 : A database access abstraction module for PHP applications
php-pear.noarch : PHP Extension and Application Repository framework
php-pecl-memcache.x86_64 : Extension to work with the Memcached caching daemon
php-pgsql.x86_64 : A PostgreSQL database module for PHP
php-process.x86_64 : Modules for PHP script using system process interfaces
php-recode.x86_64 : A module for PHP applications for using the recode library
php-soap.x86_64 : A module for PHP applications that use the SOAP protocol
php-xml.x86_64 : A module for PHP applications which use XML
php-xmlrpc.x86_64 : A module for PHP applications which use the XML-RPC protocol
To find more info about a module type:
sudo yum info php-pgsql
To install php module called php-pgsql type:
sudo yum install php-pgsql

Test PHP on your server

Create a file called /var/www/html/test.php as follows:
sudo vi /var/www/html/test.php
Append the following code:
 
<?php
   phpinfo(INFO_GENERAL);
?>
 
Save and close the file. Point your web-browser to your server's IP address such as http://10.41.143.156/test.php (feel free to replace the 10.41.143.156 with your actual IP address):
http://10.41.143.156/test.php
Sample outputs:
Fig.03: Test Apache+PHP with phpinfo() On a CentOS/RHEL v7.x server

Centos 7 How to Disable firewalld

First let's stop and disable firewalld with the following commands:

systemctl stop firewalld
systemctl disable firewalld

Centos 7 configuration after Instalation

After installing Centos 7 I found that there are a couple of annoyances with the setup. The first is that ifconfig is not installed and the second is that the network card is called some strange name not eth0 (in my case it was eno16777984)!

I found THIS site which sorted the problems:

1) To change the hostname permanently, edit the following file:
sudo vi /etc/hostname
centos7
Here you can simply put the name of your system (in my case, I have assigned it CentOS-7):
centos7 (1)
After that, edit the hosts file:
sudo vi /etc/hosts
centos7 (2)
Here add the same name, that you have added in the /etc/hostname file, after 127.0.0.1:
centos7 (3)
After reboot, it will display the new hostname.
2) After login to the CentOS7 server(minimal installation), you will notice that the system doesn’t have ifconfig command :
centos7 (4)
Install the net-tools package which will include ifconfig:
sudo yum install net-tools
centos7 (5)
Try the ifconfig command once again:
centos7 (6)
3) Change the default network interface name to “eth0”
CentOS7 has a default nic name as “en016…..”, as we can see in above screenshoot. To change it back to the default network device name like “ethX”, edit the grub file:
sudo vi /etc/default/grub
centos7 (7)
Search for the line “GRUB_CMDLINE_LINUX” and append the following: “net.ifnames=0 biosdevname=0
Will look like this:
GRUB_CMDLINE_LINUX="rd.lvm.lv=rootvg/usrlv rd.lvm.lv=rootvg/swaplv crashkernel=auto 
vconsole.keymap=usrd.lvm.lv=rootvg/rootlv vconsole.font=latarcyrheb-sun16 rhgb 
quiet net.ifnames=0 biosdevname=0"
centos7 (8)
Create a new configuration based on the currently running system using grub2-mkconfig command:
sudo grub2-mkconfig -o /boot/grub2/grub.cfg
centos7 (9)
Rename the interface files by renaming the file “/etc/sysconfig/network-scripts/ifcfg-en01…
sudo mv /etc/sysconfig/network-scripts/ifcfg-eno16777736 /etc/sysconfig/network-scripts/ifcfg-eth0
centos7 (10)
Reboot the system:
centos7 (11)
After reboot, check the interface name:
centos7 (12)
4) Configure the static ip on the server:
Edit the interface file under /etc/sysconfig/network-scripts/ directory:
sudo vi /etc/sysconfig/network-scripts/ifcfg-eth0
centos7 (13)
Here is my ifcfg-eth0 file as a sample, please change it according to your requirement:
DEVICE="eth0"
ONBOOT=yes
BOOTPROTO=static
IPADDR=192.168.250.50
NETMASK=255.255.255.0
GATEWAY=192.168.250.2
DNS1=192.168.250.2
centos7 (14)
Stop and disable the NetworkManager service, because we don’t need it on the server:
sudo systemctl stop NetworkManager 
sudo systemctl disable NetworkManager
centos7 (15)
Restart the network service(Be careful, if you are connecting remotely, because you will be disconnected after issue this command):
sudo service network restart
centos7 (16)
Check the newly assigned static ip:
centos7 (17)
5) Disable IPv6:
First check that IPv6 is enabled or not:
lsmod | grep -i ipv6
centos7 (18)
Edit the grub file:
sudo vi /etc/default/grub
centos7 (19)
Search for the line “GRUB_CMDLINE_LINUX” and add the following at the beginning: “ipv6.disable=1
Will look like this:
GRUB_CMDLINE_LINUX="ipv6.disable=1 rd.lvm.lv=rootvg/usrlv...
centos7 (20)
Create a new configuration based on the currently running system using grub2-mkconfig command:
sudo grub2-mkconfig -o /boot/grub2/grub.cfg
centos7 (21)
Reboot the system:
centos7 (22)
Once again, check the IPv6 on the system:
centos7 (23)
6) EPEL repository on Centos 7
To install the EPEL repository, issue the following command:
sudo rpm --import http://mirrors.nayatel.com/epel//RPM-GPG-KEY-EPEL-7
sudo rpm -Uvh http://mirrors.nayatel.com/epel/7/x86_64/e/epel-release-7-1.noarch.rpm
centos7 (24)
List your new repos:
sudo yum repolist
centos7 (25)
7) Enable iptables services(instead of firewalld):
When you will try to start/restart the iptables on newly install server, will get this error:
centos7 (26)
To fix this error, install the iptables-services package:
sudo yum install iptables-services
centos7 (27)
Re-run the command to restart the iptables:
sudo service iptables restart
centos7 (28)
Hope this will help you!